SpringBoot学习笔记(四)–SpringBoot-HelloWorld
功能
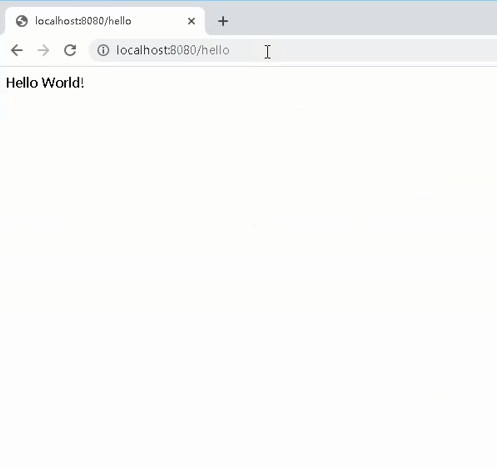
浏览器发送 hello 请求,服务器接受请求并处理,响应 Hello World 字符串。
创建 Maven 工程
1、进入以下网址:
2、参照下图,填写相关信息进行配置,填写好后点击 GENERATE
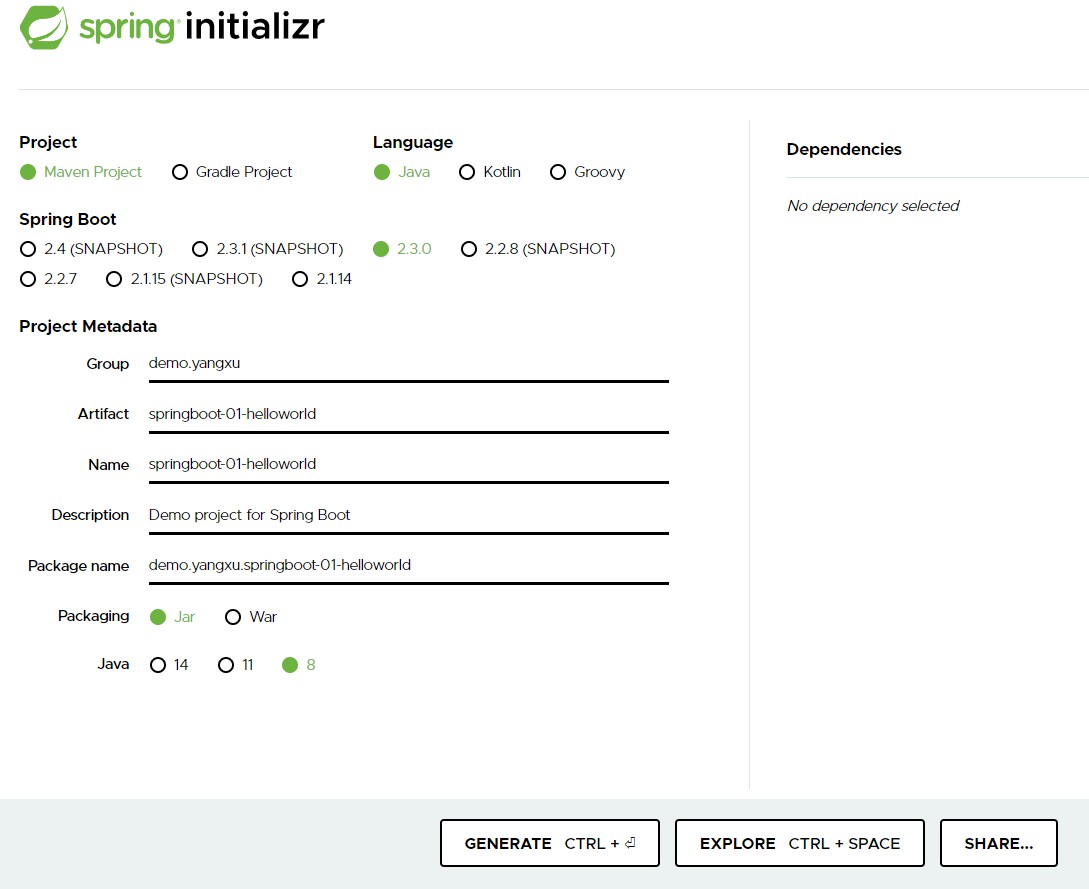
导入工程
导入 spring initializr 生成的工程。pom.xml 文件内容如下,供参考
<?xml version="1.0" encoding="UTF-8"?>
<project xmlns="http://maven.apache.org/POM/4.0.0" xmlns:xsi="http://www.w3.org/2001/XMLSchema-instance"
	xsi:schemaLocation="http://maven.apache.org/POM/4.0.0 https://maven.apache.org/xsd/maven-4.0.0.xsd">
	<modelVersion>4.0.0</modelVersion>
	<parent>
		<groupId>org.springframework.boot</groupId>
		<artifactId>spring-boot-starter-parent</artifactId>
		<version>2.3.0.RELEASE</version>
		<relativePath/> <!-- lookup parent from repository -->
	</parent>
	<groupId>demo.yangxu</groupId>
	<artifactId>springboot-01-helloworld</artifactId>
	<version>0.0.1-SNAPSHOT</version>
	<name>springboot-01-helloworld</name>
	<description>Demo project for Spring Boot</description>

	<properties>
		<java.version>1.9</java.version>
	</properties>

	<dependencies>
		<dependency>
			<groupId>org.springframework.boot</groupId>
			<artifactId>spring-boot-starter</artifactId>
		</dependency>

		<dependency>
			<groupId>org.springframework.boot</groupId>
			<artifactId>spring-boot-starter-test</artifactId>
			<scope>test</scope>
			<exclusions>
				<exclusion>
					<groupId>org.junit.vintage</groupId>
					<artifactId>junit-vintage-engine</artifactId>
				</exclusion>
			</exclusions>
		</dependency>
        <dependency>
            <groupId>org.springframework.boot</groupId>
            <artifactId>spring-boot-starter-web</artifactId>
        </dependency>
    </dependencies>

	<build>
		<plugins>
			<plugin>
				<groupId>org.springframework.boot</groupId>
				<artifactId>spring-boot-maven-plugin</artifactId>
			</plugin>
		</plugins>
	</build>
</project>
开发项目
1、编写一个主程序,启动 Spring Boot 应用
package demo.yangxu;

@SpringBootApplication
public class Springboot01HelloworldApplication {

	public static void main(String[] args) {
		SpringApplication.run(Springboot01HelloworldApplication.class, args);
	}
}
2、编写相关的 Controller
package demo.yangxu.controller;

@Controller
public class HelloController {

    @ResponseBody
    @RequestMapping("/hello")
    public String hello(){
        return "Hello World!";
    }
}
3、运行主程序测试
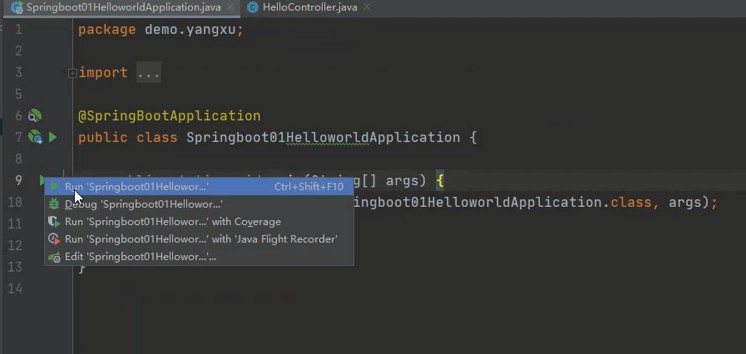
看到控制台输入下面的信息说明运行成功

在浏览器中访问
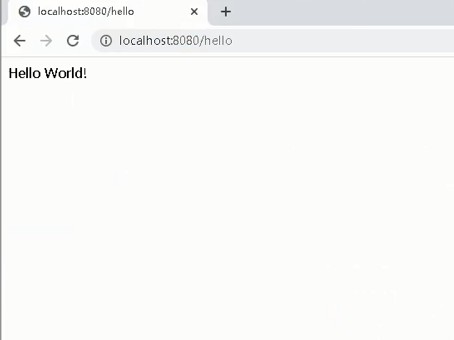
部署项目
1、访问以下网址
可以找到以下代码
<build>
    <plugins>
        <plugin>
            <groupId>org.springframework.boot</groupId>
            <artifactId>spring-boot-maven-plugin</artifactId>
        </plugin>
    </plugins>
</build>
将其配置到 pom.xml 中
2、使用 Maven 的 package 命令生成 jar 包
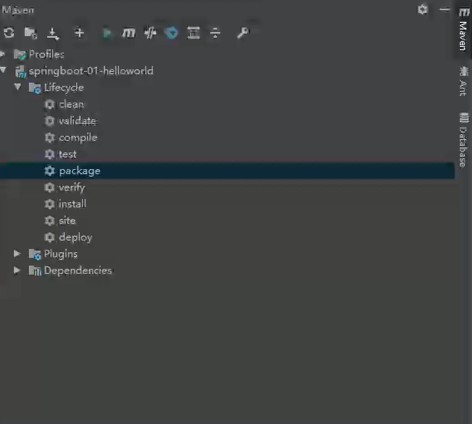
jar 包可以在 target 目录下找到
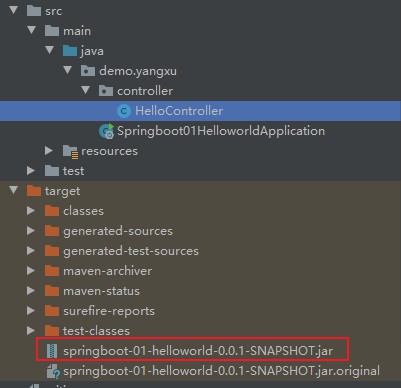
3、在 CMD 中运行该 jar 包,建议以管理员身份运行。运行指令如下,供参考
java -jar springboot-01-helloworld-0.0.1-SNAPSHOT
看到下图的信息说明部署成功
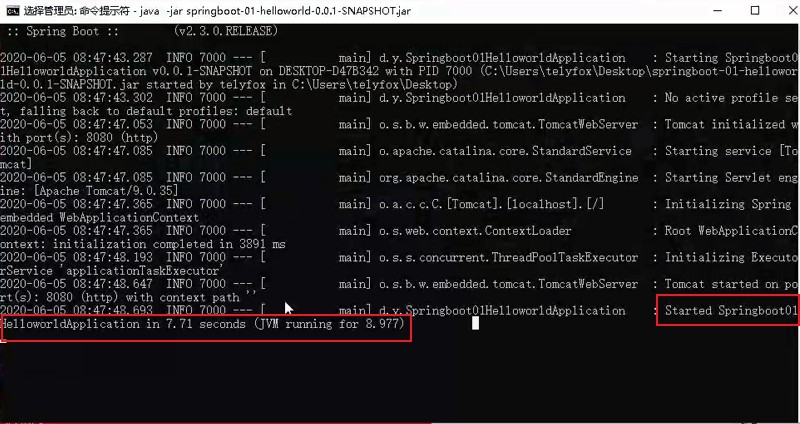
在浏览器中访问
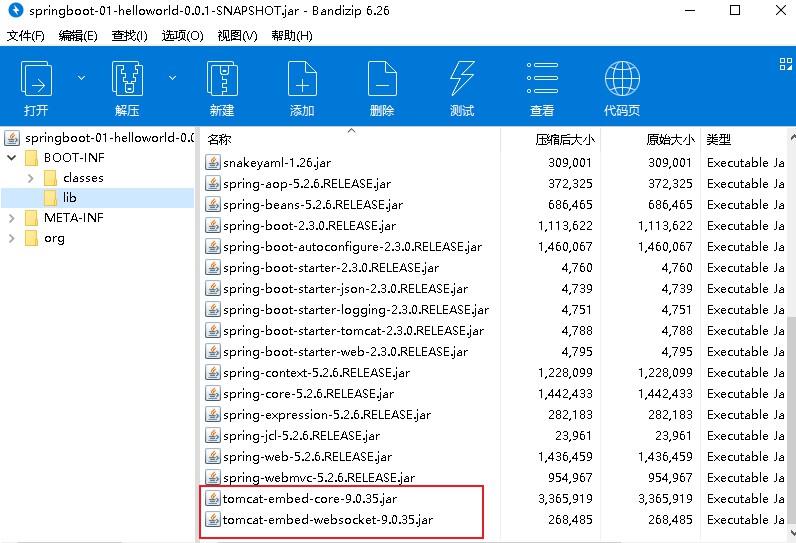
为什么没有手动配置 Tomcat 也可以运行?
打开 jar 包,在 lib 目录中可以看到 Tomcat 已经被添加进来了
码云
项目我上传到了码云,可供大家学习参考